
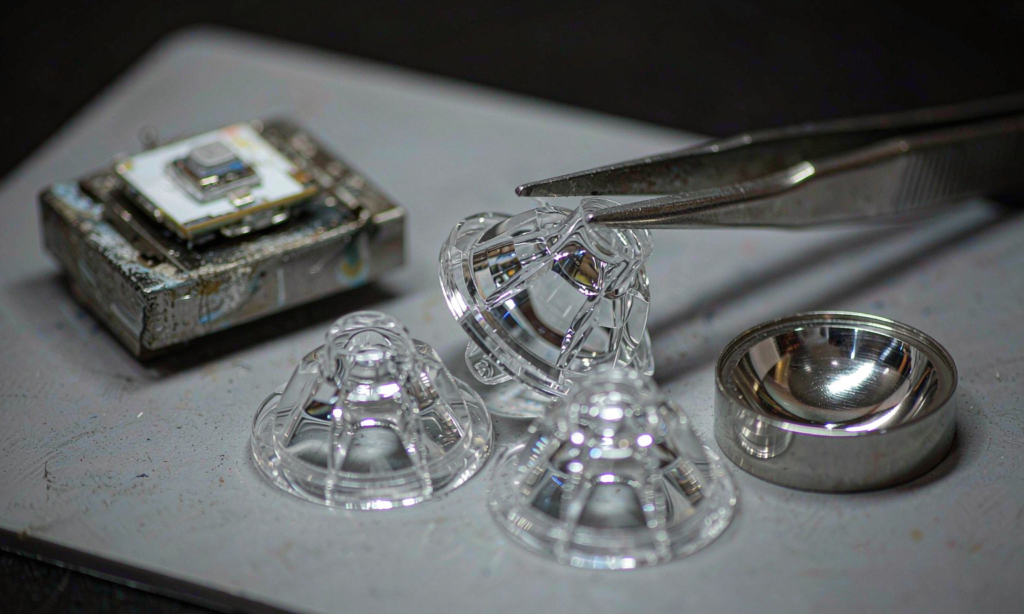
Direct answer: The break-even on a custom optic is measured in fixtures, not in beam quality. If a new lens lets you space luminaires at 1.4 times the mounting height instead of 1.1, the same floor needs roughly 38% fewer fittings – on a project of any size, that saving dwarfs a USD 15,000 to 30,000 tool. If the new lens only makes the beam look tidier at the same spacing, it is a cost with no payback, and a standard optic plus a different mounting height will usually solve the same problem for nothing.
Most custom optics are commissioned for the wrong reason. A distributor sees a competitor’s fixture with a cleaner cut-off or a tighter spot, and asks the factory for “the same lens”. What that request usually hides is a layout problem – a mounting height, a row spacing or a uniformity target – that no lens can fix and that arithmetic can.
Do the spacing arithmetic before you ask for a drawing
Fixture count scales with the inverse square of the spacing-to-mounting-height ratio. Two layouts with the same target illuminance and the same luminaire output differ in count by the square of the ratio of their S/MH values. Moving from 1.1 to 1.4 is not a 27% improvement in spacing; it is a 38% reduction in the number of luminaires.
| S/MH ratio | Spacing at 10 m mounting height | Fixtures needed, relative | What usually limits it |
|---|---|---|---|
| 0.9 | 9.0 m | 100% | Uniformity, not illuminance |
| 1.1 | 11.0 m | 67% | Uniformity in open areas |
| 1.3 | 13.0 m | 48% | Illuminance and vertical targets |
| 1.5 | 15.0 m | 36% | Racking shadows and aisle geometry |
In practice uniformity caps the ratio before illuminance does. EN 12464-1:2021 asks for a uniformity of 0.40 in storage areas and 0.60 where people pick and pack, and those numbers, not the lux target, are what stop a layout at 1.1. A custom optic that raises the S/MH limit therefore buys fixtures – but only if the uniformity survives, which is exactly what a new distribution has to be tested for.
What a custom optic actually costs, in four layers
Quotations usually show the tool and hide the rest. The honest model has four layers:
- Optical design. Two to four weeks of engineering for a freeform or TIR design against a target IES file, sometimes bundled into the tool price and sometimes quoted separately.
- Tool. The steel, the polish and the sampling runs. This is the number everyone argues about and rarely the largest.
- Part price delta. A custom lens usually costs more per unit than a catalogue part, because the cavity count is lower and the polish time is higher.
- Validation. Photometric re-test, a new IES file, and any safety or ingress re-test the change triggers – covered below.
The break-even unit count is (tool + design + validation) divided by (savings per fixture x fixtures affected), or divided by the piece-price premium if the justification is commercial rather than technical. Run that division before the first design review, not after.
Tooling benchmarks, and the lead time that kills projects
These are typical quotes from Chinese optical tool shops in 2026, not a price list. The spread between them is mostly polish grade and cavity count, and polish grade is what determines whether the lens is optically usable or merely clear.
| Scope | Typical tool cost | Typical lead time | When it is justified |
|---|---|---|---|
| Standard catalogue optic | nil | stock | Spacing target is achievable at S/MH 1.0 to 1.2 |
| Insert change to an existing lens tool | USD 3,000 to 8,000 | 3 to 5 weeks | Same footprint, different distribution |
| New single-cavity tool, non-optical polish | USD 8,000 to 15,000 | 4 to 7 weeks | Diffusers and covers where uniformity matters, not cut-off |
| New optical tool, SPI A2 polish | USD 15,000 to 30,000 | 8 to 14 weeks | Freeform TIR with a photometric target and volume behind it |
| SPI A1 or multi-cavity | USD 30,000 to 60,000+ | 12 to 20 weeks | Programme business with a multi-year volume commitment |
The lead time is the part that loses orders. A real optical tool runs ten to seventeen weeks from purchase order to approved samples once design, steel, polishing, T0 shots and at least one revision are counted. If the project ships in twelve weeks, custom optics is already off the table – unless you test a machined prototype lens first, which costs a fraction of a tool and gives you a real IES file to design the layout against.
Four free moves that beat a new lens
Before approving tooling, check whether the requirement survives any of these:
- Change the mounting height. Doubling height halves illuminance but quadruples the area one fixture covers. A layout that is over-lit at 6 m is often correct at 8 m with the same optic, and the fixture count falls.
- Choose a different standard beam. Catalogue ranges usually offer 60, 90 and 120 degrees. The coverage diameter is 2 x mounting height x tan(half angle), so moving from 90 to 60 degrees at 10 m cuts the pool from about 20 m to about 11.5 m – enough to fix an aisle without new steel.
- Move the rows. Asymmetric layouts, wall-wash rows and perimeter runs change uniformity more cheaply than any optic when the problem is a dark band rather than a hot spot.
- Change the diffuser, not the lens. Where glare rather than distribution is the complaint, a different diffusion grade or a deeper recess solves it at part cost.
If none of those closes the gap between the tested distribution and the target, the case for tooling is real. For the optical principles behind reflector and lens choices, see our comparison of reflector and lens optics in industrial luminaires.
Re-certification: what a new lens actually triggers
An optical change invalidates the photometric file by definition. LM-79 testing produces the distribution, the efficacy and the colour data, and the IES file exported from it is what every layout is calculated against. A new lens with the old IES file is a specification error that surfaces at commissioning, when the measured lux on the floor does not match the report.
Beyond photometry, the trigger depends on what else changed. A different material family, a thinner wall at the LED interface, or a different mechanical retention can pull in safety re-evaluation; the same material and the same retention usually does not. If the lens is also the sealing element, a new flange geometry means a new ingress test, and a thinner lens generally means a lower impact rating.
| Change | What must be re-run | Typical effect on schedule |
|---|---|---|
| Lens geometry only, same material and fixing | LM-79 photometry and a new IES file | 1 to 2 weeks |
| Lens material or thickness at the LED | Photometry plus safety re-evaluation | 4 to 8 weeks |
| Lens doubles as the gasket surface | Photometry plus ingress testing | 3 to 6 weeks |
| Listed product, any optical change | Photometry plus a listing update with the new data | Adds administrative lead time before the SKU can ship |
| Prototype only, CNC machined | Photometry on the prototype, repeated on production parts | Days for the prototype, full test again after tooling |
Contract terms that decide whether the tool is an asset or a hostage
A tool you paid for and cannot move is not yours in any practical sense. Six clauses cover most of the risk:
- Ownership and transfer. State that the tool is your property, and name the conditions and cost of moving it to another moulder.
- Amortisation versus outright payment. Paying in the piece price keeps cash free but locks you to that supplier until the volume is reached.
- Cavity count and steel grade. A single cavity in a specified stainless grade, with the polish grade written down, prevents the quiet substitution that shows up as haze in month eight.
- Sample approval criteria. Agree the photometric and dimensional acceptance before T0, and keep a signed golden sample.
- Price step-downs. Volume breaks written into the tool agreement, not negotiated later.
- Exclusivity window. How long the distribution stays yours, and what happens to the tool if the programme ends.
Decision matrix
| Situation | Answer | Why |
|---|---|---|
| Layout fails uniformity at 1.1 S/MH, no vertical targets | Re-run the layout at higher mounting height or wider spacing first | Cheapest possible fix, no tooling, no re-test |
| Aisle lighting with racking shadows | Asymmetric or aisle optic, often a catalogue part | Distribution shape matters more than novelty |
| Programme with 20,000+ units and a photometric target no catalogue part hits | Custom TIR tool | Amortisation per unit is small and the fixture saving is real |
| 1,500-unit project, 12-week delivery | Standard optic, standard height, revised layout | Tool lead time alone exceeds the schedule |
| Retail or brand-differentiation play | Custom cosmetic part, standard optical core | You buy the look without invalidating the photometry |
Frequently asked questions
How many units justify a custom optic tool?
Divide the total cost – tool, design and validation – by the saving per fixture, or by the piece-price premium if there is no fixture saving. A USD 25,000 package against a USD 1.20 premium needs about 21,000 units to break even on price alone. Where the optic removes fixtures from a layout, the break-even volume is usually far lower.
Can I test a lens before paying for steel?
Yes, and you should. A CNC-machined or 3D-printed prototype in the final resin can be photometrically tested for a fraction of a tool, which gives you a real IES file to run the layout against. Expect to repeat the test on production parts, because moulded optics rarely match machined ones exactly.
Does a new lens always require a new safety certification?
No. A geometry change in the same material with the same retention usually requires photometry only. Material family, wall thickness at the LED, or the way the optic holds the module are the changes that pull safety back in.
PMMA or polycarbonate?
PMMA gives higher transmission and better UV stability, with a service range around 80 to 90 degrees Celsius. Polycarbonate takes roughly six times the impact and higher temperatures, at some cost in transmission and yellowing resistance. Outdoor and clarity-critical optics usually go PMMA; impact-loaded and high-temperature positions go PC.
Who owns the IES file produced from my tooling?
You should, and the tool agreement should say so. The IES file is the asset that lets any second source quote the same fixture, so a supplier who keeps it controls your switching cost.
